Sunday 28 October 2007

Building a garden pond

We've finally finished our pond. It was a bit of work, but we reckon it's worth it, as it now gives the garden a different look and feel (even more so when we actually top it up with water!).

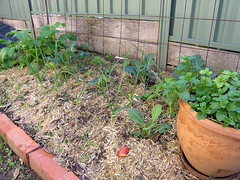
We've been looking into getting some native pond plants and ways to attract frogs too.

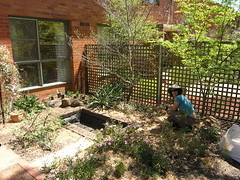
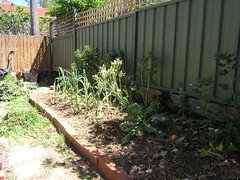
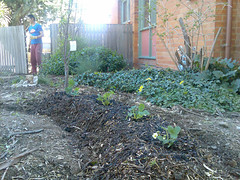
First, you must create the ideal habitat for frogs. From the slideshow here of our pond-making efforts, you can see the pond's location. It's in part shade and is shaded from the afternoon sun by the house (which is great in summer and hopefully will lessen the loss of water through evaporation), and using plants and the established trees we hope the microclimate will be conducive for frogs!

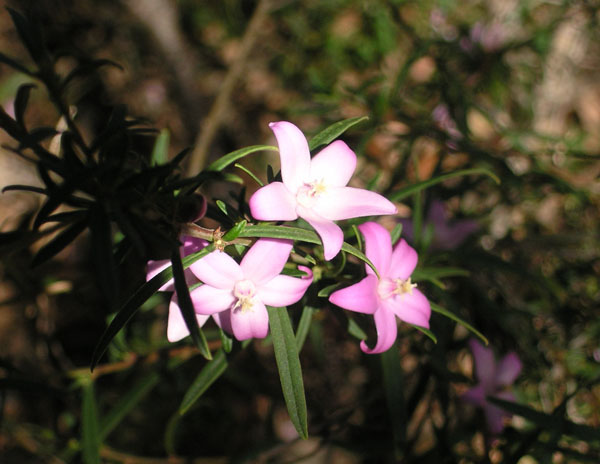
What's a microclimate? Basically, it's an area which exhibits a highly localised climate that is different to the general climate of an area. It can be as small as a few feet or as large as a few acres. We're hoping our pond will help to keep the area surrounding it cooler and more humid than areas further away. We've got a jasmine climbing on a frame nearby, a range of native plants, including lilies (a native pale vanilla lily), grasses and native violets; plus, some orchids, daphne, grevillea, and japanese maples. With the side of the house (brick) together with the lattice fence, the area is contained and protected from wind. The eaves also help protect plants from winter frosts. When creating microclimates it's good to think about

  • temperature control
  • patterns of light and shade
  • humidity
  • airflow
...as Carol from garden guides has.

What about maintaining your pond? We had a look at the ACT govt legislation website for details relating to ponds and water restrictions. Here's a snippet from the table of info they provide on the site (from left to right, staged restrictions apply up to level 5. We are currently on level 3 water restrictions):

  1. Private Ponds and Garden
    Fountains
Fountains to be switched Off unless they re-cycle water.

Ponds may be topped up by hand held hose or bucket

Fountains to be switched Off

Ponds may be topped up by hand held hose or bucket

Ponds that support fish or birds may be topped up by bucket directly filled from a tap but not a hose Ponds that support fish or birds may be topped up by bucket directly filled from a tap but not a hose Ponds that support fish or birds may be topped up by bucket directly filled from a tap but not a hose
Source: WATER RESTRICTION SCHEME APPROVAL 2002 - Utilities (Water Restrictions) Regulations 2002: Part 2, s 5: Approved water restriction scheme.

Sydney Water also have some tips on garden design for optimum water-saving, including the use of microclimates.

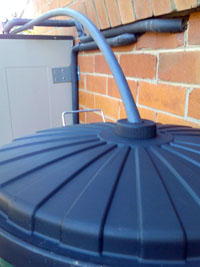
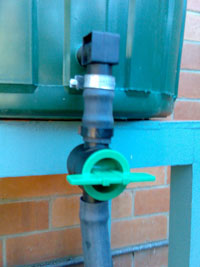
Additionally, installing a rainwater tank would mean you can top your pond up with rainwater rather than mains water. We're researching water tanks at present to see what will work in our location, to achieve optimum rain capturing and usage!

We'll post more on that later. For now, we're going tadpoling!

Sunday 21 October 2007

Books: Australian Plants for Canberra Region

While spending up big at the Botanic Gardens plant sale yesterday, we also purchased this book:

Australian Plants for Canberra Region Gardens and other Cool Climate Areas (ISBN 0 909830 59 2).
It's an informative book covering a broad range of grasses, shrubs, trees and more that grow well in Canberra's harsh conditions. It's published by Australian Native Plants Society Canberra Region Inc. (formerly the Society for Growing Australian Plants, Canberra Region Inc.) who describe the book on their website:
The purpose of this book is to assist people growing Australian plants whether they are starting a new garden, developing an established one, or just adding some native plants to any garden. It features over 10,000 Australian plants suitable for growing in the Canberra Region, and much of the information gathered here will have application elsewhere in temperate southern and eastern Australia. Many of the plants that grow successfully in Canberra's climatic extremes have a wide range of adaptability.
Well worth the $20 we think! A great addition to your book collection if you're aiming for a native garden in the Canberra region.

New plantings and diggings


Its that time of the year again and the Australian Botanic Garden Society had their biannual native seedling sale. We picked up a few seedlings at last year's Spring sale and a few more at the Autumn sale. We went a bit crazy on Saturday and stocked up on some hedging shrubs for the new bed along the side fence - some hovea longifolia, pomaderris betulina (subsp. actensis), leionema elatius, accacia - we wanted some all year colour that would provide a bit of additional screening for our backyard and a local bottlebrush with yellow flowers (callistemon pityoides) .

We picked up some more native grasses and some flowering rockery plants to plant in our rockery overlooking the pond. Once we got home we realised we would now need a rockery to plant them in, so we did some granite relocation and built up a raised bed with the spare soil we had dug up in making our pond. Before we got stuck into the rockery, we put the lining in our pond and lay a small path to the pond and made our first use of the load of brickies' sand we had delivered with our sleepers.

On the way back from the Botanic Gardens we stopped at Yaralumna Nursery, where we added some Honey Myrtle, which is a swamp tree with mauve flowers and likes wet feet and clayey soil. Perfect for the damp spot near the side gate and is in the shade for most of winter. We also picked up another accacia for the side fence bed and a big kangaroo paw for our 'grassy knoll'.


Our mate from tai chi, Rob, also gave us some grasses which we have put with our new kangaroo paw and will use to replace the weedy, festery, straggly lawn we have on our verge. I have slowly been digging this up from our front yard and turning it in to the soil so that there is almost none left save for a strip along the side footpath. These last remnants are getting the chop this weekend, as I turn it over to, mulch the surface and put in Robbie's native grasses.

Saturday 13 October 2007

Fields of colour at Floriade 2007

Floriade ends this weekend. What a great event it’s been this year! Officials reckon they may have broken last year’s record of attendance with about 340,000+ or so through the turnstiles. Pretty good!

I have to also give a big plug to, and highly commend the work of, CIT staff and students who were involved. Building and Construction students helped out and built the beach shacks that were auctioned; Horticulture students helped with preparation, layout and planting; Child Studies students were also on hand to give parents a break from energetic kids for a time! The Floristry students also displayed their talents with creative floral arrangements based on the Floriade theme of Australian myths and icons.

Our friends, all the way from the WA desert, enjoyed themselves immensely! We have started a bit of a picnic tradition I think with Floriade - a lovely way to take in the flora-tastic spectacle!

View more Floriade pics here as a slideshow.

[Reposted from Edublogs]

Garden layout and design: new moves

I mentioned earlier that we were planning out our garden beds, and have also bought some sleepers to set these up further. This image below shows how the beds were first off:

Our first effort was a basic tidy-up. This second image shows some changes we're working on:


Some slight differences. First we have cut out the Oleander (bottom left corner shrub) in favour of more productive, less toxic choices. Second, we have a second passionfruit, a Nelly Kelly, (to the right) planted to replace the aging one (to the left of the existing one). We've been wheeling in extra soil and mulch to start to build up bed #5, the new one to the right of the path (red dotted lines). This will be in full sun, so sun-hungry plants will go there, along with a couple of citrus trees (in half wine barrels). Oh, and the black dotted line is the clothesline's new home too. :o)

With this 5th bed, we hope to have more garden space for vege production and won't have to worry about mowing the little grassy patch anymore!

Cool climate gardening guide

ABC local radio (666 Canberra) personality Genevieve Jacobs has started a gardening guide for cool climates; a must-see for all Canberrans! These guides a short vodcasts available from the ABC local radio website.

If you have a feed reader like Bloglines, you can keep track of newly available vodcasts. The URL is available on the gardening guide homepage (the one ending in .xml).

It's just the sort of pep-talk we need to jump into action in our garden on a sunny Saturday! Thanks Genevieve and the ABC for these great little resources!

[image: ABC Canberra]

Spring cleaning: bye bye brocolli and caulie!

We pulled out the brocolli and caulie plants today, as they've both finished (the caulies never really started). We kept one of the caulies that was going to seed, to see if we can get some decent seed from it. I'll have to ask my Dad about that one. I remember as a kid Dad keeping the caulie seeds in the coolroom until he was ready to plant them.

The clean-up has given the broad beans and the garlic a bit more room and less competition for precious water. The mulch from winter is still pretty good and probably only needs a little top cover. I was wondering if it was worth keeping one or two more brocolli plants going just to trap the slugs, but I think they were actually attrtacting them and giving them coverage, because we hadn't really noticed many slugs before.

Next door, the onions are ready to burst into flower. The onion bulbs are starting to form too - looking forward to our own homegrown red onions, in time for lovely fresh summer salads! Yum, bean and onion salad!

Sunday 30 September 2007

Spring cleaning and mulch mulch more

We have a long weekend this weekend (hooray), so have been making the most of it out in the garden (despite the wind).

We took a drive down to Queanbeyan today to the Wholesale Sleeper Company and ordered 20 sleepers (A grade, well-priced), 2 x half wine barrels and 4 x bales of sugar cane mulch. We brought back 6 bags of potting mix with us too!

Do you get the feeling Spring is in the air? :o)

Remember this diagram? Well, we are about to dismantle our current backyard and put in garden beds made of sleepers. We'll start with beds 1 and 2, plus the worm farm area and the small area between the worms and the passionfruit. Currently this is grassed, so we're planning on putting a bed there -- it gets all day sun and we think perhaps there's a pipe below that keeps things moist(ish), as the grass is always green!

It's definitiely warming up. We put some strawberries in around the plum trees (Red Gauntlet variety) to see how they'll go. Companion Planting says that the strawberries act as 'an alterative host for a parasitic insect that preys on oriental fruit moths, a pest of peach trees' (1995, p.146), so we thought we'd see how they went with plums too. Borage is said to assist the growth of strawberries too, when interplanted.


We then drove a little further to Bungendore to the antique-recycling place there, and picked up an art deco(ish) style screen door on which to hang our jasmine - it's just taken off since the weather's warmed up! It sits next to our half-finished pond in the front garden, by the loungeroom window. Adds some height and perspective to the garden too. I'll pop a pic up soon!

Reference:

McClure, S. & Roth, S. (1995) Companion Planting. Lothian Books: Melbourne.


Tuesday 11 September 2007

Springing into spring with broccoli

We've just got back from a two-week holiday overseas in the US, and were so pleased to see the garden still in tact and progressing well (somewhat slowly due to the cold)...

We were pleasantly surprised to see our broccoli doing well and were able to cut two heads for dinner!

The caulies however seemed to have fed the local possums - but I'm thinking in true companion planting style this benefitted the broccoli no end! :)

The rocket, coriander and parsley have had a burst of growth too, and the dwarf broad beans have copious flower buds (rubs hands with glee)! We have some red onions in too and have been thinning them to use as spring onions before they form their bulbs - love a plant that multi-tasks! :o)

Nice to have had a bit of rain too in the last couple of days - let's hope there's more to come.

Roll on spring, so far so good (and with very little insect damage to boot)!

Sunday 5 August 2007

Curing olives

A colleague of Simon's had picked a heap of olives (from some trees that are over 70 years old), then had no time to cure them, so we took up the challenge to do so!

We had two recipes to try. I had tried curing olives a few years ago when we were still living in WA. I used a curing recipe from Stephanie Alexander's Cook's Companion (1st edition, p.631 if you have a copy). It worked OK, and used less salt than the one we recently tried, which is by Andrew Cope (who I think is linked to the Richmond Hill Cafe and Larder). It goes something like this:

  1. dissolve 1 cup salt in 3 litres of water in a large jar or bucket (not steel or aluminium)
  2. slit each olive lengthways to the stone and toss into the salted water
  3. replace the salt liquid everyday for 1 week, then once a week for the next 3 weeks, or until the bitter taste of the olives is gone
  4. sterilise some jars (with a good seal)...then this is where we changed the recipe...
  5. you can either store the olives in a salt wter brine with a layer of olive oil on top
  6. if you want to use the brine: mix 1/2 cup salt with 3 litres water, bring to the boil then cool before using...
  7. otherwise, we used a 50-50 mix of red wine vinegar (good quality) and an extra virgin olive oil with a mix of herbs and spices, such a lemongrass, chilli, coriander seeds, bay leaves, garlic gloves, oregano (dried/fresh) and thyme. Mix to your preference.
  8. We then let the olives sit for about 6 weeks before trying them.

A couple of 'learnings'...

We started with a mix of green and black olives. Black olives are simply ripened green olives and have a softer form. On reflection we would separate the olives which means the black ones wouldn't need as long to cure (they can become quite mushy otherwise).

Also, we probably didn't use the best olive oil for the jars and come tasting time, it really showed. The olives themselves were divine, and the red wine vinegar worked a treat, but the olive oil we used let the team down!

A work colleague asked me, 'aren't you worried about the amount of water used?' The answer is yes. What could be done with the salty water, other than throw it away? We could revert back to Stephanie's recipe were the salt is not introduced to the curing process until close to bottling, then you can re-use the water on your garden for example.

Anyway, we're always learning! here are some other curing webpages that might be of interest if you want to give olive curing a go yourself.

http://www.oliveoilsource.com/olive_recipes_.htm

http://www.wikihow.com/Cure-Olives (good alternatives if you're concerned about disposing of salt water)

And, if you've had success with curing olives, we'd love to hear from you!

Friday 3 August 2007

Mystery pink native solved!!

The small Crowea or Waxflower (Crowea exalata) is a native shrub of Victoria, related to the Boronias, and valued for the quality and quantity of its flowers. One of its brightest displays comes when most welcome, during autumn and winter. It is frost hardy and suited to cool and moist rather than hot conditions. Plants have been lost at about five years old following droughts and drying winds, though a well-watered and trimmed plant may be kept for years.

Crowea exalata - Growing Native Plants

I must thank my work colleague Lucy for her super-sleuth efforts on this one! Thank you Lucy :)

Our mystery pink flowering native is a Crowea exalata by the looks. The Australian National Botanic Gardens website provides a decent descriptionand a picture that confirms it all.

It has continued to flower throughout winter, frost and all. it certainly makes a lovely coloured centre-piece in an otherwise grey and wintery garden!distribution map

photo

images from angb (2003)

technorati tags:, , , , ,

Blogged with Flock

Sunday 24 June 2007

Setting up a grey water system on the cheap

Post note: After using this system for about a month now, we realised we hadn't added a lint catcher of filter, so have stretched a piece of flywire across the top, held on with the lid. Simon also drilled out the small filter on the tap itself, which allows for greater flow-through of water.

Canberra is switching to stage 4 water restrictions sometime in July/August, which means NO outdoor watering (i.e. using potable water). ActewAGL also have a waste water treatment program to help manage our decreasing potable water levels.

We love our garden, like many other Canberrans, and while we generally use our washing (grey) water, sometimes when we wash we don't need to water the garden then and there (particularly now in the winter months). According to ACT Health, an average household can generate up to 528 litres of grey water everyday - crikey! Makes you want to reuse it, just to make it really worth it! :o) So, reusing our washing water (approx 120 litres a wash) is a pretty good start!

So today, we put together a cheap grey water system, made up of a 75 litre garbage bin (we have a small-ish washer), with a clip-on lid, outlet, garden tap and 13mm hose. We didn't want to spend up big on a complete system (being fairly recent home owners and all!), and wanted something that could collect washing water, yet allow us to water at another time as the garden needed it. We have an existing hose running from the machine out to the garden which we move about to soak plants.

The system goes together like this:

1. The hose runs from the washing machine outlet hose to the top of the "tank" (75 litre garbage bin).


2. A hole in the top (i.e. bin lid) allows any air to escape as the "tank" fills. The hose is set at top of the "tank", to avoid any siphon-effect, so that water does not get sucked back into the machine.


3. An outlet with a tap is fitted at the base of the "tank", to allow water to be used (via a gravity-feed method) when required. This will hopefully take the pressure of the washing machine pump too (fingers crossed).
**Note: ACT Health guidelines on using grey water strongly recommend you dispose of unused grey water after 24 hours via your sewage system - you need approval to store grey water any longer than 24 hours (it's a good read actually, states how to set up and manage your grey water use and explains the affects possible of grey water on your garden too).

We have set the system up just above our sewage drain outlet and can run unused water directly into the sewage system when necessary.


4. To use the grey water, we can either attach a hose that runs out into the garden, or use a watering can, depending on what requires a little watery lovin'! The good thing is that the system is pretty much a closed one, making it relatively safe (in terms of storing it at least).

Here's a quick slideshow of the parts that came together to make our cheap grey water system.

When I say the system is "cheap", the whole lot cost less than $A40. We had existing hose (about 15 metres or so) and used some silicon to seal the outlet at the base of the bin. All parts were found from our local hardware store too. It took less than an hour to set up the system itself and we will allow 48 hours for the silicon to set (especially so it doesn't contaminate the water and thus our lovely vegies and plants!). We could get a bigger bin, but given the time limit on storing grey water, it's likely 75 litres would suffice.

Eventually, we would love to have a fully integrated grey water system, where we could reuse the water for flushing toilets, as well as for watering the garden. This, combined with a rain water tank, would really reduce our water usage!

We'd love to hear how you're coping with water shortages and restrictions - what projects have you done to conserve water in your home? What do you think of our "cheap" grey water system?

Monday 18 June 2007

Mint as companion plant to cauliflower and broccoli

I did a quick run around the garden a couple of weeks ago to see how our vege patches were going and they are holding up well so far this winter (fingers crossed!).

This pic shows our companions plants "in action", with spuds at the left side (end of the bed) with some garlic to the front of the bed, some broccoli and in the pot, some mint (a good companion for things like broccoli and caulies especially). Having mint in a pot also helps keep it under control especially in a small garden/yard like ours!

Jackie French (well known gardener and companion plant advocate) says that "The main reason for using companion planting with your brassicas is to disguise them so aphids and caterpillar producing butterflies won't find them." Jackie also suggests that planting tomatoes and brassicas together also helps mask each other's smell. I reckon Jackie would probably tell us to add more companions to this example!

Another good companion is flowering clover (and other flowering weeds), which can stop an infestation of aphids should you have such a problem. At the moment in Canberra, it seems insects don't like the cold, as we've really only been hit by a few caterpillars. Those brassicas closest to the mint pot haven't been affected though - it works! :o)

Sally Morton at Suite101 has a good article on using herbs for companion planting too. It's a good guide for getting started, if you're keen to try companion planting.

Check out more pics on our companion plants and other projects.

Wednesday 13 June 2007

Orchard trees for her birthday

Happy birthday me! I celebrated (rather than denied) my age with a kick-ass jungle party, and Simon bought me a plum and olive tree! What more could a 30-something gal ask for?!

The plum is a Japanese Santa Rosa and the olive is a Manzanillo, a popular Spanish variety.

P.S. Simon then bought another plum, having realised that we needed a second one for pollination. This one is a Japanese Mariposa which can cross-pollinate with the Santa Rosa.


Sunday 27 May 2007

Autumn flowering plants

While most other plants and shrubs are more subdued this time of year, we have some lovely flowering surprises in our garden. A little dash of colour which picks up the autumn sun through the dappled light provided by our Japanese maples.

The sacred bamboo with its bright red berries:


The lovely small grevillea shrub with stylish flowers which bow and spread their 'wings':


The ever-hardy hardenbergia which is about to burst into what looks like flowers from a proliferation of buds:


Also, my rather humble zygocactus has just begun to burst its flower buds too! Gorgeous pink feathery flowers, lovely in the sunlight:


And we've yet to solve the mystery that is the lovely pink 'native'; what IS it???...here's a close-up of the flowers and the rosemary-like leaves:


If you have an idea, please leave us a comment!

Friday 18 May 2007

Happy Friday, it's raining!

21mm ...but we need more.

Our broad beans are loving it though :o) ...happy Friday!

Friday 11 May 2007

Native plants and their origins

Simon posted earlier about the native plants we've planted in our garden and I've taken photos of those we purchased from the Aust Natl. Botanic garden plant sales. These are listed below with links to their botanical information, courtesy of the Botanic Gardens web page, a highly useful and accessible resource!


Grevilleas

So far we have three Grevilleas, Grevillea Langiera, Grevillea 'Bedspread' (a wilkinsonii hybrid bought from the Yarralumla Native Plant Nursery) and Grevillea Victoriae (subsp. Nivalis, 'Murray Queen').

Grevillea Langiera (red-cream flowers)

Grevillea 'Bedspread' (a wilkinsonii hybrid) (burgundy 'toothbrush'-like flowers)

Grevillea Victoriae (golden flowers)


Native grasses

There are some existing native grasses in our garden and to these we added a flax lily (Dianella Revoluta), Libertia Paniculata and Enneapogon Nigricans.

Dianella Revoluta (flax lily with blue berries)

Libertia Paniculata (creamy flowers)

Enneapogon Nigricans (dark narrow flower spikes that turn to fluffy seeds)


Ground covers

We've got some other ground covers too, the Viola Hederacea (Native Violet), Scaevola Albida, and an Eustrephus Latifolius (Wombat berry), which looks a little like the well-established Hardenbergia we have growing.

Viola Hederacea (Native Violet)

Scaevola Albida (pink flowers)

Eustrephus Latifolius (a 'Wombat berry', with yellow berries)


Other native shrubs

There's a couple of native shrubs that look much like the bottlebrush, but we've yet to clarify exactly what they are. To o our collection, we have added a Callistemon 'Summer Days' (Nyallingensis 'Nowa Nowa'), a Banksia Marginata, a Melaleuca Squarrosa and a (somewhat struggling) Myoporum Insulare.

Callistemon 'Summer Days' (classic red brushes)

Banksia Marginata (large golden flower cones)

Melaleuca Squarrosa (creamy flower clusters, similar to a bottle brush but looser)

Myoporum Insulare


Kangaroo paws

We have planted a couple of varieties of kangaroo paw too; Anigozanthos 'Orange Cross' and Anigozanthos 'Bush Dawn', plus some small seedlings which aren't yet identified. We've never really had much luck with getting kangaroo paws established, but the ones we've planted are doing OK for the moment. I'm not certain they'll cope over winter with the frosts, but we'll just have to see I guess!

Anigozanthos 'Orange Cross' (possibly Flavidus variation or Flavidus-Preissii hybrid) (vivid orange flowers)

 Anigozanthos 'Bush Dawn' (possibly a hybrid from Pulcherrimus?) (yellow-lime coloured flowers)

Seedlings

Here's a couple we haven't quite identified yet (we lost the labels to some!)... Can you help us out?

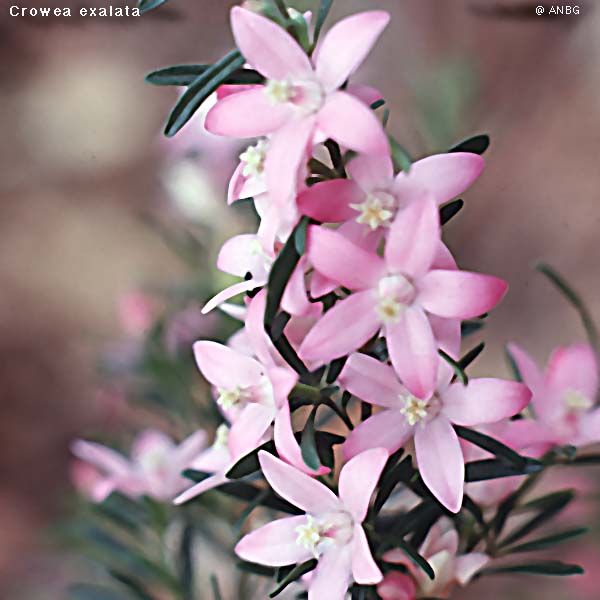
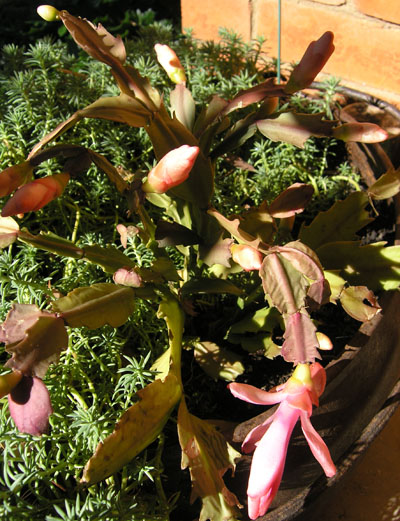
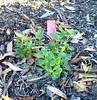
What is it? (pink flowers almost like a Geraldton wax, but pointier; leaves that a slightly grey-green, small and pointed)

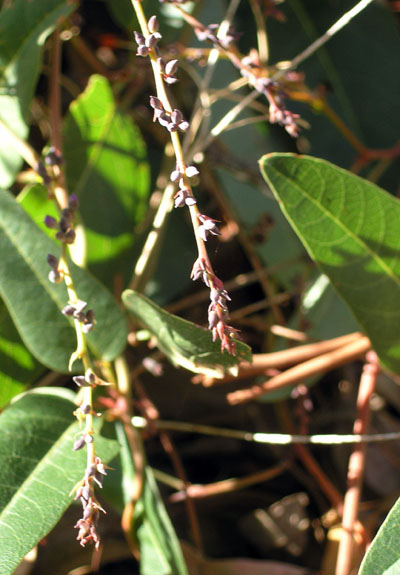
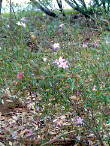
What is it? (looks like a coastal paperbark; silver trunk; very small leaves that seem horizontal and flat; new growth on tips is lime green!)

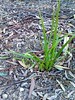
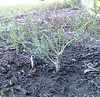
What is it? (soft green foliage that arches; thin leaves)


Planting our natives

What did we do to get our natives into the ground? Well, Simon did the hard work of breaking into the clay!

  1. We were advised to make the planting hole quite wide (at least 50cms), given the clay soil, so that the roots could spread as well as grow deeper (depending on the plant itself).
  2. We didn't over-do the composting, just some friable, loose mulchy-type compost that we knew wasn't too rich (natives don't like too much nitrogen).
  3. Then set the plant in place, staked those that seemed to need it, then covered and didn't pack the soil too tightly.
  4. Watered and then kept the soil slightly moist (checking by digging our hands into the soil around the tree). It's good to not water too close to the trunk, to avoid the plant getting soggy roots (especially as the clay soils in Canberra hold the moist for longer!).

So, growing natives is not a difficult as it may seem and there's plenty of information around to give you a head-start. Gardening Australia has plenty of stories and fact sheets about growing natives, from potting and hedging natives, to propagation and managing trees.

technorati tags:, , , , ,

Blogged with Flock

Tuesday 8 May 2007

Garden layout and design: getting started

Since reading Companion Planting, we've been re-thinking the layout of our garden and how best to use the small space we have, and how to make the most of Canberra's four seasons, beginning with Autumn!

Below is the current layout of our backyard where we have planted vegies along with managing the existing shrubs and trees.


The northerly aspect provides a good deal of heat and light to bed #1, which backs up against the northern garage wall. We have red onion seedlings here (about 2 weeks in now). The opposite bed, #2 sits along our neighbour's fence and receives some late sun and is partially shaded by the fence for much of the day. Here we have spuds, garlic, broccolli, caulflower, silverbeet (all about 2 weeks old), and herbs (oregano, french tarragon, sage, crawling thyme), which sit under the bay tree (which sits in the northeast corner of the backyard).

In the northwest corner on the back fence sits our compost pile.

Beds #3 and #4 are pretty much the same bed, but we've separated them because bed #3 has more established plants like galangal, lemongrass, chillies (jalepeno and habanero), and a cherry capsicum.

Bed #4 sits under the shade of a huge native pine (the name of which escapes me right now) and has not had much use it seems, as the soil there is dry and water resistant. We've been building this bed up with pea straw, compost, worm castings, fish & seaweed emulsion, and mulch from other areas of our garden. We have planted some broad beans there (about 10 days ago), sowing them directly into the ground.

We weren't too sure what would work under the pine (southwest side of the backyard), so we'll see how the broad beans go. Even is they don't do too well, they should fix some nitrogen back into the soil! Beds #3 and #4 get late sun, before being shaded again later as the sun sets. these beds sit alongside our fenceline on the street-side of the block (southside).

We may try a 3-4 year planting cycle, so that the future crop benefits from the previous crop in what it leaves in the soil.

Next: ideas on companion plants for a 3-4 year planting cycle!

Gardening...with a good book

I've been dipping into our gardening books over the last couple of weeks, a lovely bedtime reading chore!

My favourite at present is Companion Planting, part of the Lothian series on successful organic gardening (1995). it's a bit hard to find now - Amazon don't have copies available, but I'm sure a local library or two would have it. I've been planning our planting cycles and companion plants as a result.

Another fav is The Canberra Gardener, published by the Horticultural Society of Canberra Inc. A must-have if you are planning on gardening in Canberra! You can read more via the link on the right of this page. :o)

Another weekend past-time we enjoy is listening to Saturday gardening with Genevieve Jacobs on ABC 666. Genevieve also put together a list of gardening books that would keep you occupied for weeks (a good winter activity!):

Gardening isn’t just about getting your hands dirty: it’s also about beauty and ideas, daydreams and inspirations. Winter is a great time to snuggle up with a book and make plans, or research plants and ideas which intrigue you. While gardening magazines are wonderful for quick bites of information and up to the minute news, there’s also a world of gardening history and culture to be explored.
I'd agree Genevieve, a wonderful past-time in which to indulge! Here are some other gardening stories from the program too.

Sunday 1 April 2007

Australian Botanic Gardens plant sale

Last week the Australian Botanic Gardens had their biannual plant sale. They have one sale in Spring and another in Autumn. We went to their sale at the end of Spring last year and picked up some seedlings for the front yard, including a small acacia, some tiny kangaroo paws, which didn't fare too well, and some native ground covers.

This time we picked up a couple of grevilleas (which did not look like they were related at all), a nice banksia (which we hope will grow to be a nice screen for our study), some native grasses and some larger kangaroo paws.

We planted them in some spots where we had cleared away some of the grass that has been encroaching into the beds. There is a thickish layer of dry mulch and leafy material from our eucalypts out the front but after about 10-15cms down there is a rock hard layer of clay. We have started trying to break this down, by moving wheelbarrow-loads full of organic matter from the beds under the pine tree out the back, or right under the eucalypts and hacking into the clay to mix it in with gypsum. We have gone through a 20kg bag of Gypsum already!!

Hopefully winter rain, gypsum and the roots of the new plants we are putting in eventually start to break through the soil. There's plenty of potential there, it just needs to be broken down.

Thursday 15 March 2007

40 years of Carriers in Oz

Around the country, Carriers and their offspring celebrated the 40th anniversary of our grandparents Alphonse and Nessie Carrier arriving on the shores of Fremantle Harbour, disembarking from a boat ride from Penang, with Christine (mum), Antoinette, Henreitte, Adrian and Genevieve in tow.

The remnants of the Carrier clan in Perth met for a beautiful lunch at the Red Herring, on the opposite side of the river that they had arrived on 17 March 1967. Nana, Aunty Tuane & Ken, Aunty Henriette, Uncle Adrian, Clarissa & Michael & Michael's granddaughter Asha, Michelle & Craig, Mum and Dad were all able to make it.


Meanwhile on this side of the country, Marg and I planted a planted a hybrid australian 'red centre' bush lime in the front of yard our house. The rain arrived just in time to prepare the soil and smooth the transition from pot to ground. It was a nice ritual to do and reminded me of when we planted some trees in the front of Safety Bay.

The lime was a house warming gift from one of my uni friends who gave it to us when we had our Chinese New Year dinner a couple of weeks back. The front yard of our place is a native garden so it will fit in well and hopefully be producing tasty treats in not too long.

The plant was developed by CSIRO (Dad's old employer) by grafting native limes onto domestic citrus rootstock, as the native limes would not survive in an urban garden. You should be able to find these through distributors around the country. It is quite fitting that we planted a hybrid plant to celebrate our hybrid migrations.

So now we have a red centre blood lime in the front yard, some lemon grass in the backyard and a kaffir lime tree in a pot (and moveable out of the Canberra frosts).